One of my sweetest blogger friends has nominated me to receive this Blogger with Attitude Award! Thank you very much Marilyn from
Marilyn's Cards and More. Take a hop over to Marilyn's blog to see all her lovely creations. I'm sure you will enjoy your visit. With this award I can get a prize from
Digis with Attitude! All I need to do is tell 3 things about myself and nominate 5 blogger friends with attitude to receive this award also. Then put this badge on my sidebar with a link connecting it to Digis with Attitude.

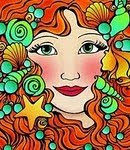
Three things about me...1. I just discovered digi images in spring of 2010 and I think they are the best thing since sliced bread!
2. Other than creating my own cards and projects, I really enjoy checking out all of the blogs of the cool people I've met through this craft.
3. I'm always looking for "new" things to add to my projects from some of my "old" embellishments that I'd forgotten about. Sometimes it works out and sometimes it doesn't.
The bloggers I would like to nominate to receive this award are as follows. This is going to be a random choice since I love ALL of my bloggy friends.
1.
Amber Staying Crafty
2.
Lisa The Purple Place
3.
Jen ABC Art, Bellydancing, & Crafting
4.
Barbara Diane Barbara's World of Whimcees
5.
Debbie Schneider Pardon My Passion
I would like to say thank you to these ladies for sharing their beautiful talents and for giving me and so many others inspiration in crafting. Thank you ladies!
Don't forget to hop over to Digis with Attitude to receive your $5.00 gift certificate and to display their badge on your sidebar. Have a great day!

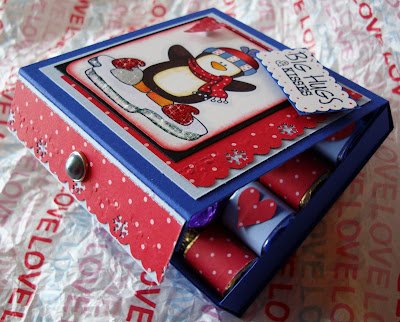
 This sweet little penguin is also from Whimsey Doodles.
 This little cutie pie is also from Whimsey Doodles. Her name is Penelope.


 Thanks for checking out my blog. I hope you enjoyed looking at my projects.


 She has been colored with copics, photoshop, gel pens and stickles. I added a few extra clouds to my lavendar sky with a sponge,white craft ink and stickles. The sentiment is from Stampin Up. Gems, ribbon and purple cardstock are from my stash. The rest of the papers are from Stampin Up. Cuttlebug embossing folder was used on the green panel. I distressed the edges of the image and the green panel behind it with scissors. I found a heart charm in my mish mash and dabbed it with purple pink and blue copics and put a clear gem on it. It doesn't show up very well in the picture. A close up shot of this little brave bear is below.